How to clean PS4 joystick
After a hard day, you’ve finally settled down on the sofa for some stress-relieving gaming with your PlayStation 4, but have noticed that some buttons and the controller’s analog sticks are not as responsive as usual. However, the controller is not necessarily damaged: it is often the fault of the dust and dirt that lurk between the keys and make them unresponsive. In this case, just do a good cleaning to get the controller back on track.
As? Don’t know how to do it? Do not worry! I’m here to tell you how to clean the PS4 joystick on the outside and inside. I warn you that internal cleaning requires a lot of attention and good dexterity, as you will have to open the controller and intervene on the internal components. If your PS4 controller’s warranty is still valid, you may want to take it to the store where you bought it and ask for a replacement. In any case, I warned you! I therefore take no responsibility for any damage.
All clear? Good! Now, go get the controller to clean and give yourself some free time to read the guide and follow my instructions step by step. You will see that with a little patience and attention, you will eventually be able to get your controller back on track and get back to enjoying your favorite video games right away. Enjoy the reading!
Index
- Necessary
- How to clean PS4 controllers
- How to clean PS4 controllers on the outside
- How to clean PS4 controller inside
Necessary
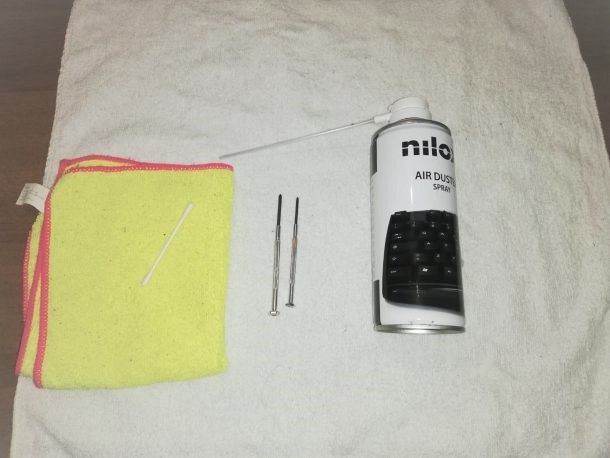
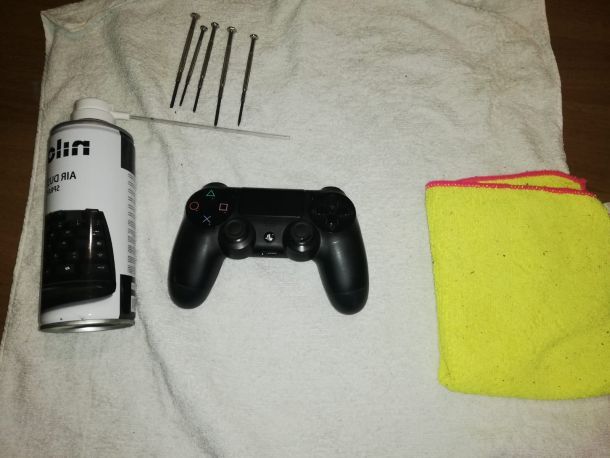
Before starting, I recommend that you get the right products to be able to do a proper and safe cleaning of your PS4 controller . You may already have what you need at home, but in any case, here is an inventory of what you need.
- Microfiber cloth
- Compressed air
- Screwdriver for 6mm screws
- Brush or cotton swab
- Alcohol and water solution
- Tweezers
You will need the microfiber clothyou will need to remove the dust from the external case of the controller and carry out a preliminary cleaning . Microfiber is the most suitable material because it is light and thin, but at the same time it collects dust well.
For dust residues between the analog sticks and the buttons, compressed air must be used , which is also useful for removing any residual dust inside the gamepad.
The precision screwdriver will be used to remove the 4 rear screws of the controller, with a diameter of 6 mm.
Finally, to thoroughly clean the dust from keys and sticks you can use a medium bristle brush or a cotton swab . These can also be useful for cleaning some internal components, without damaging them.
I anticipate that you may need a solution consisting of alcohol and water, to intervene on the most resistant dust and dirt. If you can, get some tweezers with narrow tips as well which may help you disassemble the controller, as you will see later.
Do you have everything you need with you? OK! So let’s start with the tutorial and give your controller a good clean!
How to clean PS4 controllers
Cleaning the outside of the PS4 controller is really simple, so you can do it without any risk.
In general, I suggest that you clean the DualShock 4 often, so that you can always keep it in top condition and prevent dust and grease from accumulating over time. Often a little cleaning of the case, buttons and levers is enough to eliminate dust and prevent it from lurking inside the controller.
My advice is to open the controller when you notice malfunction problems that prevent its use and only if the product warranty has expired.
How to clean PS4 controllers on the outside
So, are you ready? Good! First of all, if necessary, disconnect the USB cable and any headphones / earphones from the controller, then unplug the power cable of the PlayStation 4 to avoid turning it on by accidentally pressing the PS button on the gamepad.
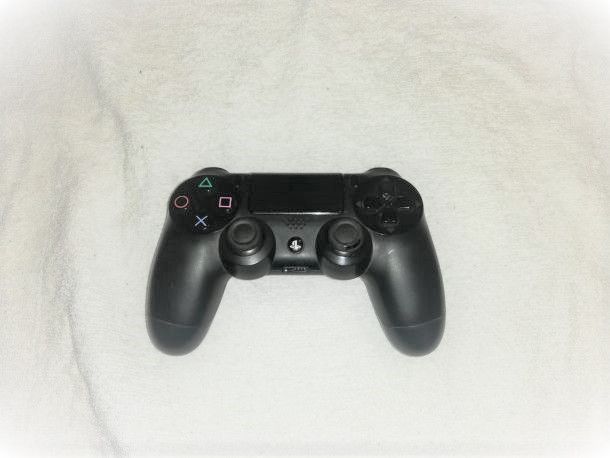
Then place the controller on a well-lit flat surface, perhaps using a white cloth to collect the dust and be able to work more accurately.
Now, take the microfiber cloth and gently wipe it all over the outer shell of the gamepad, then spray the compressed air on the buttons, under the analog sticks and on the directional keys.
I suggest you use compressed air several times, especially on the most dusty spots. For more thorough cleaning in tight spaces such as the USB port and headphone audio jack, bring the compressed air nozzle as close as possible.
In case microfiber cloth and compressed air are not enough to remove the dirt, then you will have to switch to the hard way!
Dampen a cotton swab (or the tip of the microfiber cloth) and pass it over all the keys and levers, rubbing between the cracks , without exaggerating. Alternatively, you can use the medium bristle brush . You can also create a solution by mixing water and a little alcohol , in case you want to intervene more effectively on the accumulated dirt, but you have to be sure of what you do and dose everything well (a solution that is too “aggressive” could damage some component).
How about the final result? I’m sure after following these tips of mine your gamepad will feel like new! You just have to try the controller: if the controls seem responsive and you are satisfied with the result, you can stop here.
How to clean PS4 controller inside
Isn’t cleaning the external body of the controller enough and the controls still don’t respond as well as you would like? Then let’s move on to a more thorough cleaning of the controller.
Since cleaning the inside of the PS4 controller is quite complex, I suggest that you carefully consider whether or not to try it. Ideally, you should give it a try with an old damaged PS4 controller that you no longer use, so you can try the procedure with confidence and become familiar with the various steps.
Be aware that PS4 controllers contain very delicate components inside, so read the various steps carefully. Before proceeding, I suggest you try resetting your PS4 controller by following the tutorial I just listed for you. Resetting the controller may fix some command-related issues, so it’s worth a try.
So, to start this little operation, first of all you have to remove the 6mm screws on the back of the controller, using a precision screwdriver . I recommend using a container to keep the screws tidy, as they are very small and therefore easy to lose!
I also suggest that you do not use a screwdriver of a different size or shape, as you would risk blocking the screws in their seat or damaging them. With the screws removed, you will need to open the controller. Firmly grasp the lower shell with one hand and the upper shell with the other , then start separating them little by little . You may have to make several attempts, but do not lose patience and above all do not exert too much force, because otherwise you could break the flat cable that connects the two bodies.
If you can’t open the controller with your bare hands, pry it up a bit with a flat-blade screwdriver or any thin-tipped plastic object. In this step I suggest you to be as gentle as possible in order to avoid damaging the controller.
The side buttons L2 and R2 could prevent opening: in this case , press them and the rubber comes out of their compartment, then try again. Once you have passed this step, gently extract the Flat from the connector by taking it with your fingers or with pliers, then divide the two parts.
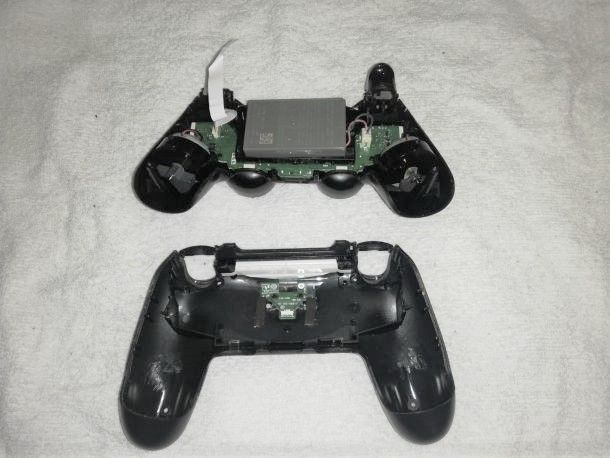
OK, now take the front case of the gamepad and clean it with the cloth or the cotton swab to remove the dust. Once this is done, you can concentrate on the rear case that contains the various components of the controller.
The first thing you will see inside the gamepad will be the battery , which is connected to the motherboard through a connector. Carefully and precisely, disconnect the connector using your hands or tweezers, then remove the battery .
The next step is to split the two internal parts of the controller. To do this you will have to unscrew the screw in the center of the black part, that is the battery holder, in order to remove it.
Next, detach the controller’s side triggers , then hold the case firmly with one hand and use the other to remove the part containing the motherboard . If you find dust on the motherboard, use compressed air for safe cleaning.
Let’s now move on to cleaning the keys using the brush or cotton swab . You will see that the buttons and directional keys are covered with a piece of rubber – always remove it using your hands or tweezers.
In this way you can remove the buttons by simply turning the controller body upside down, then clean them one by one using the cotton swab and alcohol , then dry them with the microfiber cloth . In case the rubber covering the buttons and directional sticks is dirty, you can use the cotton swab to clean it.
Now take the part with the motherboard and remove the rubber pads of the analog sticks , then clean them using a dry cotton swab . You can also pass the cotton swab on the mechanisms and spray some compressed air inside them to eliminate the dust. If you notice that the analog sticks are damaged, you can consider replacing them by following my guide.
Once the cleaning is complete, you will need to reassemble the controller. Replace the motherboard part on the key part, then screw the black housing back on and place the battery in it as you found it.
Then connect the battery to the motherboard via the connector, and then the two controller shells via the flat cable.
We are almost there! All you have to do is join the two parts of the controller and screw in the four screws . If the cleaning was successful you will see that you will be more responsive.
If the PS4 controller still doesn’t work as it should, then the problem is likely related to components like the motherboard or battery. In this case I suggest you read my guide on how to fix the PS4 controller to try to get to the head of the situation and solve it (independently or with the support of official assistance, if there is still warranty coverage).